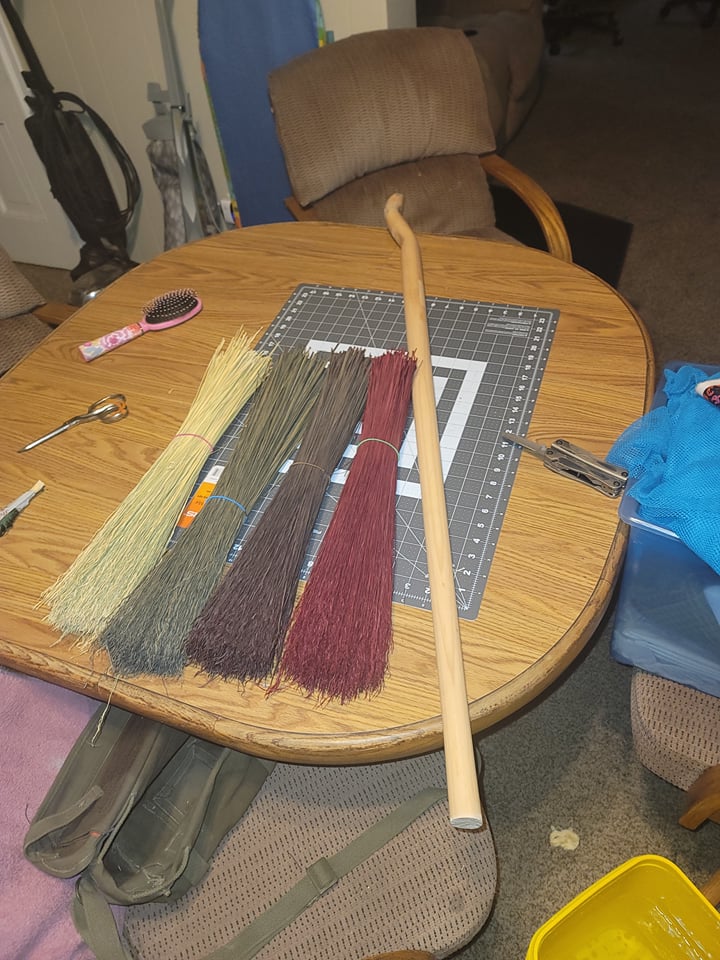
Well my old ride burned in the wildfire last year and I decided to build another one. I started by deciding on the type of handle I wanted. Did I want a natural handle or a shaped hardwood? While out and about I found at my local hardware store two replacement handles for flat bottomed shovels that had been in the store since the 50’s. Made of hickory the shape was just calling me and it was decided that I needed both of the handles and nabbed them right up. For $10. My next task was searching for Broomcorn in my search I found a wonderful Esty seller MeckleyBrooms | Etsy who had come of the most beautiful broomcorn in many colours. It was set I ordered half pound bundles of Gray, Wine, Brown, and natural broomcorn at 20” long. 2.5 pounds of broomcorn. After a ups shipping debacle, It finally arrived and I began.
First, I sanded much of the finish off the handle and cut off about 3 inches from the top to give me a nice area to attach to. Next, began the very slow process of blending the colours together till I was happy with the result. I ended up removing most of the natural corn as it was too bright and stood out much more than I liked, Re-blended the broomcorn, and finally got ready to attach to the handle.

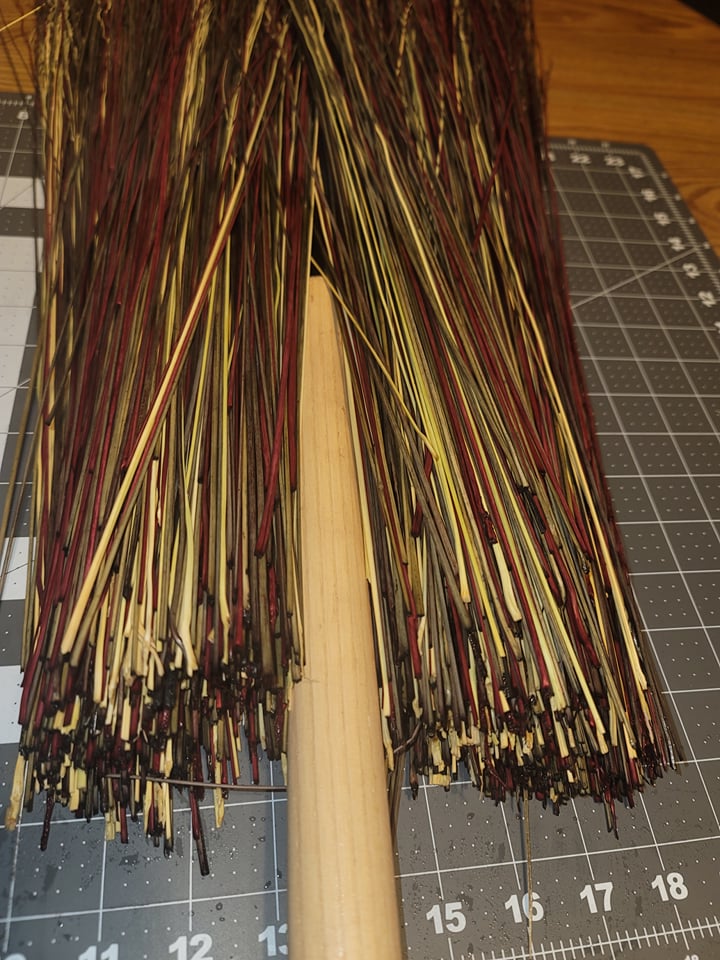
Starting with a bucket of hot water I soaked the upper or rear-ends of the corn for two hours. While the dye ran it wasn’t bad and didn’t cause any issues.
Taking the corn and laying it on my cutting mat I test fit by hand where the handle would fit. And then tied the cord to the shaft so it would align with the starting wrapping point.

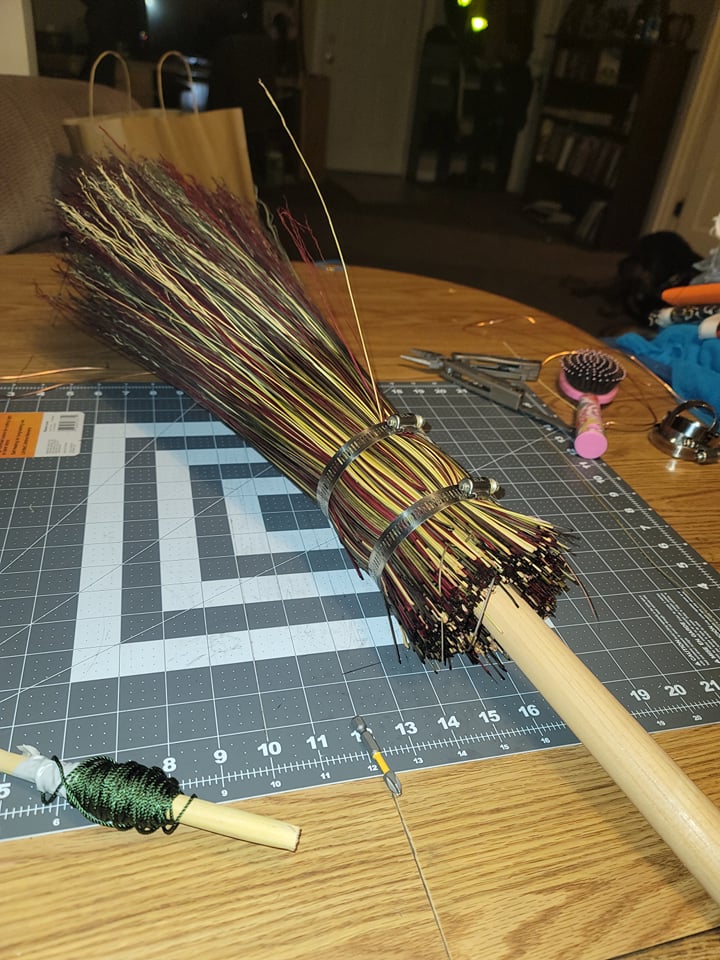
Using 2 large pipe clamps, I tightened and adjusted the corm onto the handle till I was happy and began to wrap. First, I use copper wire to act as a stay and bent the twist into the corn. Slowly I began wrap the Deep green cord around the corn pushing tight to the last wrap. After finishing that off I switched to Jute wrapping the same way to the next copper stay and slightly past. Using a sail needle, I worked it through and under the past wraps finished and tied off.

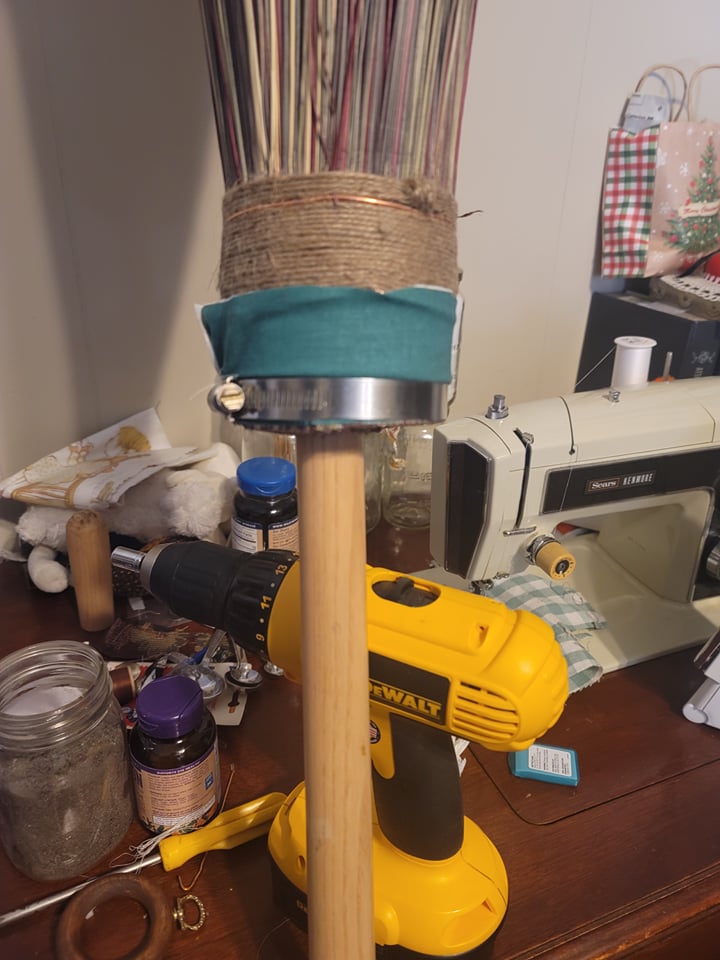
After removing the clamps I allowed the broom to dry till morning. Wrapping the base of the broom with cloth I reattached a pipe clam and used the clamp as a guide to cut the corn flush and level. I left the clamp on the end to allow it to air dry. might take a few days for it to fully dry out but I use a wood stove for heat so that will help.
In all respects, all she needs now is to be cleansed in case my intent was faltered by my rude roommate. And she’s ready to keep my home clean of negative energy.
I do have plans for a few decorations but first, need to find a blacksmith to make the foot-pegs I’m thinking of after seeing how much she looks like a racing broom. I also plan on attaching a quartz point to the head of the handle. Later I will burn a few one=word spells into her handle using a pyromancy tool.
I plan on building a nice wall rack for both the inside and outside of the house for her and her friends to rest when not in use.


 Wow! You are definitely a broom maker!
 It sounds like you were able to collect some lovely parts (and all for a very good price) and then pour your heart into putting it all together. The result is a one-of-a-kind besom that is sure to serve you well!

